
At an outdoor concert, you lift your GoPro as blue stage light hits the fog and the bass shakes the rail under your hands. You want crisp faces, clean shadows, and smooth motion, not a grainy blur that looks like it got lost in the dark. A few smart settings make a huge difference here, especially once the lights start flashing and the crowd starts moving.
Key Takeaways
- Shoot 4K at 24 fps or 25 fps, not 5.3K, for cleaner low-light footage and better torch, neon, and stage glow.
- Keep shutter near double frame rate, like 1/48 or 1/50, and use a tripod or gimbal to avoid blur.
- Set ISO Min 100 and ISO Max 400, or 800 if needed, to control grain and avoid ugly high-ISO noise.
- Use Natural color, 10-bit, and High BitRate for smoother skin tones, better shadow detail, and less banding in dark scenes.
- Lock white balance when lighting stays consistent, use Auto for fast-changing scenes, and test clips for flicker before the show starts.
Set Your Gopro to 4K at 24/25 Fps
One simple switch can make your GoPro footage look much cleaner at night: shoot in 4K at 24 fps, or 25 fps if you’re in a PAL region. You’ll get less noise than 5.3K, which matters when the stage lights fade and shadows swallow detail. The image looks calmer, smoother, and more polished.
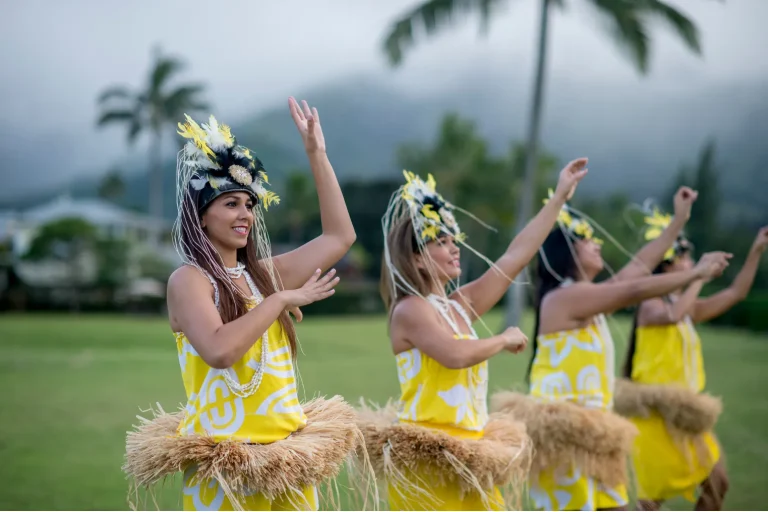
That lower frame rate also helps your camera gather more light in each frame. Faces look less muddy. Neon signs hold their color. Smoke, lasers, and glittering confetti keep more texture instead of turning into a grainy soup. For luau night shows, these settings can help preserve the glow of torches and stage lighting with cleaner detail. Pair this setting with High bitrate and 10-bit color if your model offers them. You’ll keep more detail and have more room to shape the footage later. Try it next time, and your night clips may finally match the memory.
Match Shutter Speed to Frame Rate
Once you’ve locked in 4K at 24 or 25 fps, shutter speed is the next setting that shapes how the night actually feels on screen. For natural motion, aim for roughly double your frame rate, like 1/48 or 1/50 at 24 fps, or 1/50 at 25. That follows the 180° shutter rule and gives your footage cinematic cadence.
Think of it as shutter rhythm and motion matching. Slow the shutter and neon signs glow brighter, but movement smears, so a tripod helps when the crowd sways and the stage lights pulse. If you’re walking handheld, bump it to around 1/96 or 1/100 to cut blur and help stabilization. Go as slow as 1/24 or 1/25 only for static scenes. Otherwise, things turn dreamy fast. For outdoor cultural performances, applying these settings alongside photo timing awareness helps you catch brighter stage moments more cleanly.
Keep ISO Low for Cleaner Night Video
Guard your ISO like it’s the last dry seat at an outdoor night concert. Set ISO Minimum to 100 and cap ISO Maximum near 400. That keeps night footage cleaner because grain starts creeping in around 800, then gets ugly above 1600. Build a LOW Light preset with an ISO Maximum shortcut, so you can lift exposure fast without leaving the door open to mushy footage. If motion is calm, use a slower shutter, about twice your frame rate, to preserve exposure latitude. If you’re walking handheld, raise shutter for steadier clips and accept more noise. Watch sensor heat, trust noise profiling, and add light before pushing past 400. Your shadows will stay richer, signs sharper, crowds less waxy, and your edits much happier. If you’re filming a luau or similar event, phone camera backup clips can help cover wide performance moments when your GoPro angle gets blocked.
Set White Balance for Indoor Lighting
Indoor light loves to play tricks on color, so white balance deserves a quick check before you hit record. Auto works for many rooms, but mixed bulbs can wander during long takes. If lighting stays steady, use manual kelvin to match the source. Think 3200K for warm tungsten and 4000K to 4500K for cooler fluorescents. For time-lapses or interviews, wb locking keeps color from drifting mid-scene. If daylight spills through a window, use subject prioritization and set balance for the light on your face, not the lamp behind you.
- Auto is fine for quick indoor clips
- Match tungsten at about 3200K
- Set cool fluorescent around 4000K to 4500K
- Lock color before long takes
- Follow the light hitting your subject for more natural skin tones
Choose Sharpness and Color for Low Light
In low light, you’ll get cleaner results when you choose sharpness and color settings that protect detail instead of fighting the dark. Start with MEDIUM sharpness, keep BitRate on High, and lean toward Natural color so shadows stay textured and skin tones don’t turn oddly punchy. If you plan to grade, 10-bit gives you more room to work, but in a dim room with humming lights, the simple combo often wins. At cultural performances, keep colors and contrast true to the scene so your photos stay respectful to the event and the people involved.
Sharpness Settings For Noise
You want settings that Reduce noise and Preserve detail without fake edge sparkle. Sharpen selectively later if needed.
- Medium keeps shadow grain calmer.
- High makes black areas look crunchy.
- Low smears tiny textures and signs.
- Leave room for gentle cleanup later.
- Test clips before the band starts.
When stage lights flicker and the crowd sways, medium sharpness holds faces, sequins, and smoke with a more natural feel, and less noisy glitter after sundown too. If you are filming the Waimea Valley Luau, test these low-light settings from arrival to finale so changing performances do not catch you off guard.
Best Low-Light Color Profile
When the room drops into dim blues and warm amber spots, set Color to Natural and Sharpness to Medium for the cleanest low-light balance. Natural keeps skin tones and stage gels believable while GoPro’s Color science avoids the brittle look that extra processing can create. In your Profile comparisons, skip Flat and Log here. They sound flexible, but shadows get noisy fast and the image can turn mushy after compression. Medium sharpness preserves edges on guitars, sequins, and smoke without carving halos into them. Only drop to Low if you’ll apply serious noise reduction later. That choice also keeps your Grading workflow simpler, so you spend less time rescuing footage and more time enjoying the encore from the crowd beside the stage rail.
Bit Depth And Bitrate
Start with 10-bit color and a High BitRate, and your night footage keeps more of the scene’s quiet detail. You get smoother shadows, gentler neon shifts, and fewer ugly blocks in dark corners. If your camera offers 10 bit workflows, use them. Your edits will hold together better later, especially for archival masters.
- Set BitRate to High for cleaner blacks
- Use Medium Sharpness to keep detail crisp
- Skip High Sharpness because noise loves applause
- Pick Natural color for truer stage lights
- Avoid LOG at night and trust smarter bitrate choices
Natural usually beats Vibrant after sunset. It protects skin tones and signs from turning cartoon loud. LOG sounds fancy, but in dim scenes it often gives you flat files that fight back. At event shoots like luaus, preserving subtle color can help bright signs and Hawaiian luau desserts look more natural under mixed night lighting.
Turn On 10-Bit and High Bitrate
Flip on 10-Bit color and set BitRate to High before you head into dim streets, quiet trails, or any scene lit by little more than signs and moonlight. You’ll keep richer color data for grading, cleaner shadow shifts, and fewer ugly compression artifacts when night footage gets pushed in editing. Pair those settings with Natural or Flat for a smarter 10‑bit workflow in low light. If you’re filming after dark in Hawaii, keeping an ear on NWS Honolulu can help you avoid sudden weather changes before a night shoot.
| Setting | Why it helps |
|---|---|
| 10-Bit | Smoother color and less banding |
| High BitRate | More detail and fewer blocky shadows |
It preserves subtle gradients in dark skies, wet pavement, and smoky stages where noise usually creeps. Just remember the tradeoff. Bigger files demand storage planning, faster cards, stronger editing hardware, and better playback compatibility checks, unless you enjoy surprise stutter at midnight.
Set Anti-Flicker for Night Shows
Rich color and high bitrate help at night, but stage lights bring a different headache: flicker. You can tame it by matching Anti-Flicker to local mains power for better sensor synchronization and cleaner playback.
Night footage loves rich color, but stage lights fight back, match Anti-Flicker to local power for cleaner, steadier playback.
- In PAL regions, pick 50 Hz with 25 fps.
- In 60 Hz regions, use 60 Hz with 24 or 30 fps.
- Check playback on location for quick banding diagnosis.
- Watch for dimmer compatibility with LED walls and spotlights.
- Balance shutter speed and ISO, because flicker isn’t just exposure drama.
This combo cuts pulsing and banding from artificial lights, especially during loud, bright songs. Still, some rigs misbehave. Test a short clip, review it at real frame rate, and adjust before the encore starts tonight backstage for calmer results each time.
Build a GoPro Low-Light Preset
Start by creating a new Video preset, name it something simple like Low Light, and save your night-ready setup in one place. You’ll want quick shortcuts for ISO Maximum and Shutter Speed, so when the street glows, the music swells, or the scene suddenly gets dim, you can adjust fast without fumbling through menus. It’s a small setup step, but it makes your GoPro feel much smarter after dark.
Create The Preset
When the lights drop and the stage begins to glow, build yourself a custom Video preset so your GoPro doesn’t have to guess. Tap plus in Presets, name it Low Light, and open settings. Shoot 4K, not 5.3K, at 24 fps or 25 fps PAL. Set ISO Minimum to 100. Keep ISO Maximum at 400 for cleaner files, or 800 if needed. Set shutter near double frame rate, around 1/48 or 1/50, then save with Custom icons, careful Shortcut placement, and simple Preset sharing.
- Start with 4K for sharp, manageable nighttime files
- Use 24 fps so each frame drinks light
- Lock ISO 100 minimum to protect shadow detail
- Cap ISO at 400, or 800 if necessary
- Raise shutter near 1/100 when movement gets messy
Add Quick Shortcuts
Now give that Low-Light preset a few quick shortcuts so you can react before the singer hits the bright chorus and the room turns smoky blue. Add ISO Maximum and Shutter Speed for Quick access, then use Custom icons so you spot them fast in a dark crowd. Keep ISO Minimum at 100. Cap ISO Maximum at 400 to 800. Skip settings that tempt noisy 1600-plus footage. Choose shutter near 1/48 for 24 fps, or 1/100 if your hands are dancing too. Save it, keep Auto White Balance unless long takes drift, and pair it with 4K 24/25, High bitrate, and 10-bit if available. Before filming a performance, check the venue’s photo etiquette so your quick-access setup does not break luau show rules. Gesture shortcuts help too.
| Shortcut | Stage picture |
|---|---|
| ISO | Less grain |
| Shutter | Cleaner motion |
| WB | Stable color |
| 4K24/25 | Dark detail stays |
Add ISO Max and Shutter Shortcuts
Because low light can change from one block to the next, give yourself two quick exits in your LOW Light preset: ISO Maximum and Shutter Speed. Use an ISO shortcut for Quick access when the street suddenly darkens. Keep ISO 400 to 800 for cleaner video, and avoid jumping past 1600 unless you must.
In low light, keep ISO Maximum and Shutter Speed one tap away so darker streets do not wreck your footage.
- Add a Shutter shortcut for 1/48 or 1/50 at 24 or 25 fps.
- Walking handheld? Bump to 1/96 or 1/100 for steadier footage.
- Expect to raise ISO when you use faster shutter speeds.
- Skip shortcuts that tempt ISO 3200. It gets noisy fast.
- Swipe down to Preferences and confirm shortcut placement. Set ISO Minimum to 100.
That small setup change saves clips when neon fades and drums get louder nearby. If you’re filming beach performances in Hawaii at night, choose lifeguarded beaches and stay aware of changing ocean conditions nearby.
Use a Tripod for Sharp Low-Light Shots
A tripod gives your GoPro a real advantage once the light drops and those quick ISO and shutter shortcuts still aren’t enough. In dim venues, your camera often needs 1/48 or 1/50 at 24 or 25 fps, and handheld footage will smear even with stabilization. Solid tripod mounting lets you hold ISO near 400, avoid the ugly jump past 1600, and keep details clean.
Good tripod stability also helps when slow shutters make Hypersmooth less effective and movement starts to stutter. With careful tripod composition, you can keep stage lights, faces, and set pieces crisp while allowing a little motion blur in dancers or drifting smoke. Set 4K, 24 or 25 fps, anti-flicker to 50 Hz, sharpness to Medium, and BitRate to High. If you are filming a luau or cultural show, stable framing can also make seating comfort easier for seniors by reducing the need to reposition often for a better view. Worth it.
Use a Gimbal When You Need Motion
Reach for a gimbal when the scene needs motion and the light still feels thin. You’ll keep 24 or 25 fps, use a shutter near twice the frame rate, and still get smooth tracking through a dark crowd. Mechanical stabilization beats shaky walking and the stutter that can ruin Hypersmooth at night. It also helps you hold ISO around 400 to 800 instead of creeping toward ugly 1600. Pair moving shots on the gimbal with static tripod views for cleaner coverage. If you go handheld, raise shutter toward 1/100, but expect more noise and less nighttime charm. If you’re filming at a luau, pack light but don’t forget Waimea Valley Luau essentials like extra batteries and a compact remote.
Use a gimbal in low light to keep motion smooth, shutter slow, and ISO clean without Hypersmooth falling apart.
- Follow performers without blur
- Keep slower shutter settings
- Save image quality at lower ISO
- Use remote control for quick starts
- Pack extended battery for longer sets
Add Light and Avoid Common Low-Light Mistakes
You’ll get cleaner GoPro footage in low light when you bring your subject closer to a window or add a small LED close by instead of cranking the ISO and hoping for magic. Keep an eye on easy mistakes like blown-out windows, flicker from artificial lights, and mushy blur from slow shutter speeds that stabilization can’t hide. A little smart light goes a long way, and when you pair it with solid settings, your night scenes keep their color, texture, and quiet city glow.
Use Available Light
In low light, the smartest move is often to hunt for the light that’s already in the room.
- Use natural windowlight whenever you can.
- Move closer to stage lamps or exit signs.
- Turn walls, menus, or jackets into practical reflectors.
- Frame audience silhouettes against brighter backgrounds.
- Keep your GoPro at 4K and 24 or 25 fps.
You’ll get cleaner footage when your subject steps near a window, doorway, or stage edge. That extra glow hits the sensor first, so you won’t need to lean on noisy ISO. Indoors at night, a tiny LED can lift faces without flattening the mood. Watch how skin looks under bulbs and neon. Warm light feels cozy. Green light looks seasick. Even a pale wall can save dinner shots. If you’re filming around sunset in a busy attraction, checking crowds and weather can help you time your shoot for better available light and fewer people in frame.
Avoid Common Mistakes
Finding a good pool of light is half the job. Add a small RGB panel or constant LED, and nudge your subject closer to windows, stage lamps, or any warm spill you can find. That simple move cuts high ISO strain and keeps ugly grain from creeping in above 800 to 1600.
If you’re filming a Hawaiian performance, check the Waimea Valley Luau start time ahead of arrival so you can claim a brighter spot before the show begins.
Next, dodge the usual traps. Skip 5.3K at night and shoot 4K at 24 or 25 fps so your GoPro can gather more light. Cap ISO Maximum in a LOW Light preset, ideally at 400, with 800 still usable. Watch for metering mistakes, composition noise, and focusing errors when the scene gets dim. Use a tripod or gimbal for slow shutters. If you stay handheld, raise shutter to 1/96 or 1/100. Also skip HDR, LOG, and harsh sharpness.
Frequently Asked Questions
How Can I Improve Gopro Battery Life During Long Night Shows?
Improve battery life by using Lower brightness, keeping Wi‑Fi off, and recording at 1080p/24fps with standard bitrate. You should disable GPS, shut the rear screen, stay cool, and carry Power packs or spare batteries too.
What Memory Card Speed Is Best for 4K Low-Light Recording?
Choose UHS II or at least V30 rated cards for 4K; 30 MB/s sustained writes prevent dropped frames. You’ll get best results with High end SDXC cards, especially if you’re shooting 10-bit or low-light clips.
How Do I Reduce Crowd Noise While Keeping Clear Concert Audio?
You’ll reduce crowd noise by moving closer to the stage, aiming directional mics at performers, using wind reduction, keeping gain low, and recording a board feed or lav; then apply post filtering and compression later.
Should I Clean the Gopro Lens Before Shooting in Low Light?
Yes, you should clean it first: wipe lens with a microfiber cloth, remove smudges and dust, and check seals before shooting. You’ll avoid flares, preserve contrast, and get noticeably sharper low-light footage, especially around stage lights.
Can Cold Weather Affect Gopro Night-Show Performance?
Yes, cold weather can hurt your GoPro’s night-show performance: you’ll get faster battery drain, more sensor noise, sluggish controls, and condensation risk. Keep spare batteries warm, pre-set settings, and let the camera acclimate between temperatures.
Conclusion
With the right GoPro settings, you’ll catch night shows the way they feel. Stage lights glow instead of smear. Dark corners stay textured, and the crowd’s cheers don’t come with muddy footage. Keep 4K at 24 or 25 fps, cap ISO, lock white balance, and steady the camera when you can. Do a quick test clip before the opener, and you’ll be sitting pretty when the finale hits and the room starts to sparkle.